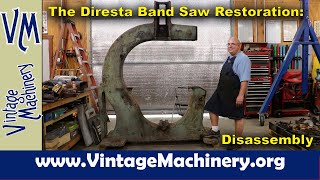
diresta bandsaw restoration: disassembly and loading for shipment
Published 6 months ago • 38K plays • Length 27:22Download video MP4
Download video MP3
Similar videos
-
 32:41
32:41
the jimmy diresta band saw restoration, part 1: disassembly
-
 37:11
37:11
diresta bandsaw restoration 34: wright bandsaw guides restored and first cut!
-
 19:45
19:45
diresta bandsaw restoration 33: crowning band saw tires
-
 24:27
24:27
diresta bandsaw restoration 31: installing the motor starter, flat belt, and first run!
-
 22:00
22:00
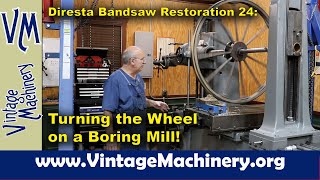
diresta bandsaw restoration 24: turning the wood rim wheels round on a boring mill
-
 27:48
27:48
diresta bandsaw restoration 25: adding some “bling” to the saw and installing the upper wheel
-
 17:50
17:50
the jimmy diresta band saw restoration, part 3: prepping parts by removing rust and old paint
-
 37:59
37:59
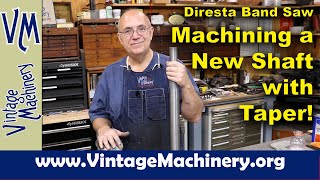
jimmy diresta bandsaw restoration 21: machining a new upper wheel shaft with a tapered spindle
-
 25:49
25:49
diresta bandsaw restoration 12: making a fixture to locate a shaft for pouring babbitt bearings
-
 26:21
26:21
diresta bandsaw restoration 35: the final step - counter weight installation
-
 16:34
16:34
diresta bandsaw restoration 18: painting the main casting!
-
 27:12
27:12
the jimmy diresta band saw restoration, part 4: fighting a loosing battle at removing a shaft
-
 28:14
28:14
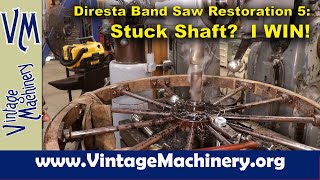
the jimmy diresta bandsaw restoration, part 5: the battle of the stuck wheel shaft - i win!
-
 22:27
22:27
diresta bandsaw restoration 16: finishing the bottom babbitt bearings - scraping and fitting
-
 21:48
21:48
diresta bandsaw restoration 27: finishing the bottom wheel and installing the table
-
 22:22
22:22
diresta bandsaw restoration 23: reassembling the upper band saw wheel bearing assembly
-
 19:31
19:31
diresta bandsaw restoration 17: attaching table and guide mounts to the main casting
-
 22:57
22:57
diresta bandsaw restoration 13: applying body filler to the main casting for paint prep