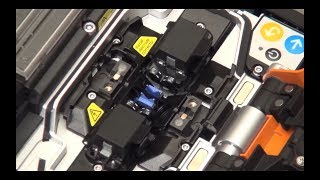
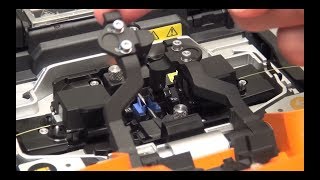
inserting the fibers into the splicer (help video for type-72c/type-82c(no4))
Published 5 years ago • 1.1K plays • Length 0:52Download video MP4
Download video MP3
Similar videos
-
 0:48
0:48
inserting the fiber into the splicer (help video for type-71m12(no4))
-
 0:36
0:36
connecting the ac adapter (help video for type-72c/type-82c(no7))
-
 0:41
0:41
inserting the fibers into the splicer(help video for type-72m12(no6)
-
 0:41
0:41
inserting the fiber into the splicer (help video for type-201em4(no4))
-
 0:40
0:40
inserting the fiber into the splicer (help video for type-201evs(no4))
-
 0:40
0:40
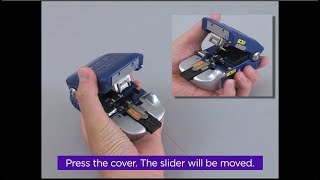
cleaving the fiber with an fc-8r-mc (help video for type-72c/type-82c(no3))
-
 1:53
1:53
splice protection (help video for type-72c/type-82c(no6))
-
 0:46
0:46
fiber type and protection sleeve settings (help video for type-72c/type-82c(no5))
-
 1:36
1:36
wireless lan setup (help video for type-72c/type-82c(no23))
-
 0:48
0:48
using the tray on the case (help video for type-72c/type-82c(no15))
-
 0:32
0:32
installing the battery pack (help video for type-72c/type-82c(no8))
-
 0:58
0:58
stripping the fiber coating (help video for type-72c/type-82c(no1))
-
 3:09
3:09
replacing the electrodes (help video for type-72c/type-82c(no21))
-
 0:27
0:27
adjusting monitor angle (help video for type-72c/type-82c(no12))
-
 0:24
0:24
cleaving the fiber (with fc-7r)(help video for type-201evs(no3))
-
 0:50
0:50
disengaging the fiber clamps from the hood (help video for type-72c/type-82c(no13))
-
 0:21
0:21
cleaning the bare fiber (help video for type-72c/type-82c(no2))
-
 0:28
0:28
cleaning bare fiber pads (help video for type-72c/type-82c(no18))
-
 0:32
0:32
performing self inspection (help video for type-72c/type-82c(no22))